Custom Button
This guide explains how to create and use a Custom Button.
Create Custom Button
You can create and run Custom Buttons in ClassClicker. The Custom Buttons are stored in the cloud.
Steps to create Custom Button
- Click the Custom Buttons icon from the Menu.
- Click the Create button in the Custom Buttons page.
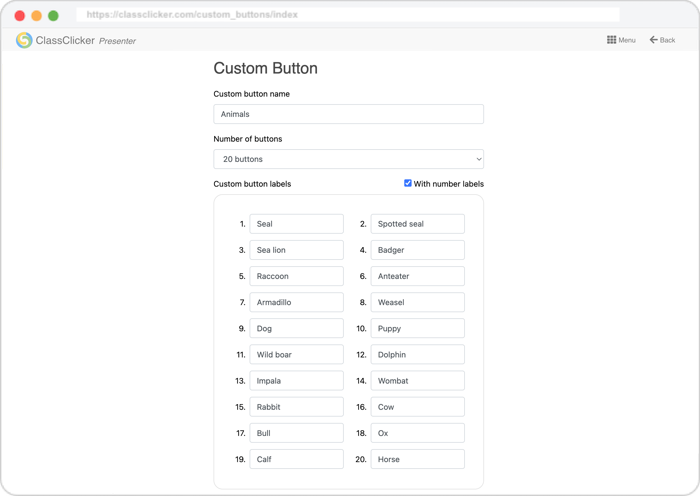
- Enter a Custom Button name in the Custom Button page.
- Select the number of buttons from 2 to 20 buttons.
- Enter the Custom Button labels.
- Click the Back button.
- The Custom Button has now been created and the Custom Button will be shown in the Custom Buttons page.
Header options
- Menu
- Click to go back to the Menu.
- Back
- Click to go back to the previous page.
Custom Button options
- Custom Button Name
- Enter a Custom Button name.
- Number of buttons
- Enter the number of buttons.
- With number labels
- Tick the checkbox to show the buttons with number labels.
- Custom button labels
- Enter the Custom Button labels.
Create Custom Button
Run Custom Button
You can start a voting session (class) with a Custom Button stored in the cloud.
Steps to start a voting session with a Custom Button
- Click the Custom Buttons icon from the Menu.
- Select a Custom Button with the checkbox in the Custom Buttons page.
- Click the Run button.
- The voting session with the Custom Button begins.
Select Custom Button in live voting
You can select a Custom Button in live voting.
Steps to select a Custom Button in live voting
- Start a class from Menu or go back to the voting page.
- Select a Custom Button name in the Option type menu in the voting page.
- The voting session with the Custom Button begins.
Select Custom Button in Quiz
You can select a Custom Button in Quiz.
Steps to select a Custom Button in Quiz
- Click the Quiz Set icon from Menu.
- Click a Quiz Set title in the Quiz Sets page.
- Select a Quiz in the Quiz Set page.
- Select a Custom Button name in the Option type menu.
- Click the Back button.